AndroidStudio下NDK开发流程
前言
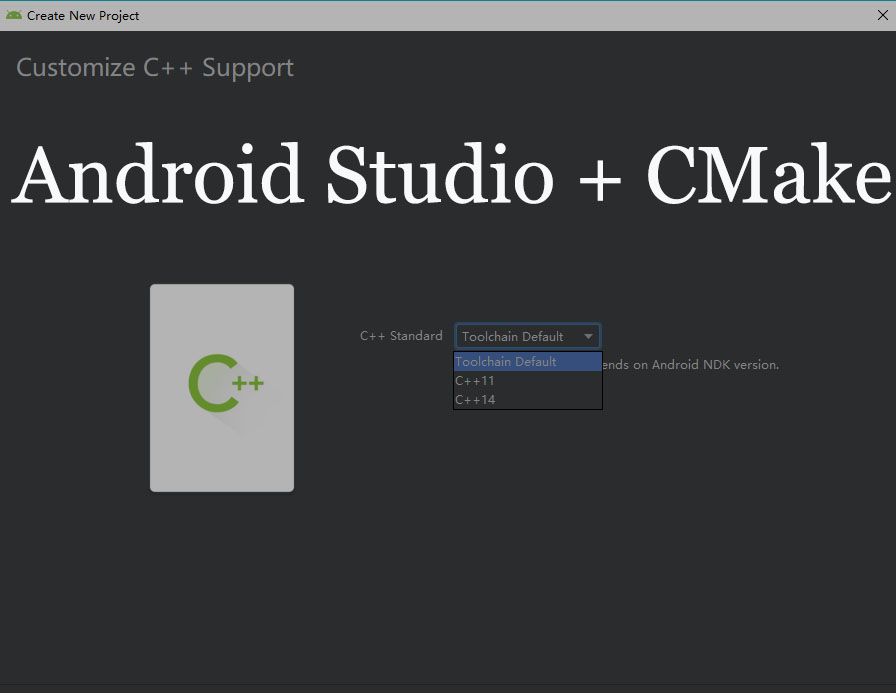
使用Android Studio进行NDK开发时,可在创建Android Studio项目时选择创建C++项目,创建好之后,默认会在src/main/下创建一个cpp的文件夹,C/C++相关的文件就存放在这个文件夹中;在app下面的build.gradle中有NDK的相关配置
一、NDK开发进行文件加密解密
1、实现Java层native方法
- 创建Android项目
- 写一个含有加密和解密按钮的view
<LinearLayout xmlns:android="http://schemas.android.com/apk/res/android"
    android:layout_width="match_parent"
    android:layout_height="match_parent"
    android:orientation="vertical">

    <Button
        android:layout_width="match_parent"
        android:layout_height="wrap_content"
        android:text="加密"
        android:onClick="mCrypt"/>

    <Button
        android:layout_width="match_parent"
        android:layout_height="wrap_content"
        android:text="解密"
        android:onClick="mDecrypt"/>

</LinearLayout>- 编写一个实现对文件加密解密的java类: Crpytor.java
package com.example.ndk.filecrypt;


public class Cryptor {

    static {
        System.loadLibrary("cryptor");
    }

    /**
     * 对文件进行加密
     * @param path 需要加密的文件路径
     * @return 加密后的文件路径
     */
    public native static void crypt(String path,String cryptPath);

    /**
     * 对文件进行解密
     * @param cryptPath 加密文件的路径
     * @return 解密后的文件路径
     */
    public native static void decrypt(String cryptPath,String decryptPath);
}
- 在View对应的java类中实现相应的点击事件
public class MainActivity extends AppCompatActivity {

    @Override
    protected void onCreate(Bundle savedInstanceState) {
        super.onCreate(savedInstanceState);
        setContentView(R.layout.activity_main);
    }

    /**
     * 加密的点击事件
     *
     * @param view
     */
    public void mCrypt(View view) {
        File sdDir = Environment.getExternalStorageDirectory();
        String sdpath = sdDir.getAbsolutePath();

        String path = sdpath + "/ndk.jpg";
        String cryptPath = sdpath + "/ndk_crypt.jpg";
        Cryptor.crypt(path, cryptPath);
        Toast.makeText(this, "加密完成", Toast.LENGTH_SHORT).show();
    }

    /**
     * 解密的点击事件
     *
     * @param view
     */
    public void mDecrypt(View view) {
        File sdDir = Environment.getExternalStorageDirectory();
        String sdpath = sdDir.getAbsolutePath();

        String cryptPath = sdpath + "/ndk_crypt.jpg";
        String decryptPath = sdpath + "/ndk_decrypt.jpg";
        Cryptor.decrypt(cryptPath, decryptPath);
        Toast.makeText(this, "解密完成", Toast.LENGTH_SHORT).show();
    }
}
2、使用 javah 命令生成头文件
- 执行javah命令,因为AndroidStudio使用的是UTF-8的编码,所以在执行javah命令时需要指定编码为UTF-8(默认为GBK);
javah -encoding UTF-8 com.example.ndk.filecrypt.Cryptor- 生成 com_example_ndk_filecrypt_Cryptor.h 文件
3、创建JNI/CPP目录,添加NDK本地支持
- 在src/main目录下创建jni/cpp目录,将刚刚生成的.h文件复制到该目录下
- 在项目配置中设置 Android NDK location 目录,需要提前下载 NDK 相关支持 (在Android SDK 下载中选择 SDK Tools 中的 LLDB 、CMake 、NDK 三项进行下载)
- 在jni 目录下创建 CMakeLists.txt 文件
# cmake 版本
cmake_minimum_required(VERSION 3.4.1)

# 添加支持
add_library( # 为library设置名称
             cryptor

             # 设置该library为共享的
             SHARED

             # 提供C/C++相关文件的相对路径
             cryptor.c )


find_library( # Sets the name of the path variable.
              log-lib

              # Specifies the name of the NDK library that
              # you want CMake to locate.
              log )

target_link_libraries( # Specifies the target library.与上面add_library的名称相同
                       cryptor

                       # Links the target library to the log library
                       # included in the NDK.
${log-lib} )- 在 app目录下的build.gradle 文件中配置jni 目录,以及NDK支持
android {

    defaultConfig {
        // NDK的配置
        ndk{
             moduleName "cryptor"
            abiFilters  "armeabi-v7a", "x86"
        }
    }

    sourceSets {
        //配置jni目录
        main {
            jni.srcDirs = []
        }
    }

    externalNativeBuild {
        //配置cmake文件路径
        cmake {
            path file('src/main/jni/CMakeLists.txt')
        }
    }

}
4、实现头文件中定义的函数
#include "com_example_ndk_filecrypt_Cryptor.h"
#include <string.h>

char password[] = "qazwsxedc";
//加密
char *crypt(char normal_path[], char crypt_path[]) {
    //打开文件
    FILE *normal_fp = fopen(normal_path, "rb");
    FILE *crypt_fp = fopen(crypt_path, "wb");
    //一次读取一个字符
    int ch;
    int i = 0;
    int pwd_len = strlen(password);
    while ((ch = fgetc(normal_fp)) != EOF) {//End of FILE
        //加密
        fputc(ch ^ password[i % pwd_len], crypt_fp);
        i++;
    }
    fclose(normal_fp);
    fclose(crypt_fp);
}

//解密
char *decrypt(char crypt_path[], char decrypt_path[]) {
    //打开文件
    FILE *crypt_fp = fopen(crypt_path, "rb");
    FILE *decrypt_fp = fopen(decrypt_path, "wb");
    //一次读取一个字符
    int ch;
    int i = 0;
    int pwd_len = strlen(password);
    while ((ch = fgetc(crypt_fp)) != EOF) {//End of FILE
        //加密
        fputc(ch ^ password[i % pwd_len], decrypt_fp);
        i++;
    }
    fclose(crypt_fp);
    fclose(decrypt_fp);
}


/**
 * 加密
 * @param env
 * @param cls
 * @param jstr
 * @return
 */
JNIEXPORT void JNICALL Java_com_example_ndk_filecrypt_Cryptor_crypt
        (JNIEnv *env, jclass cls, jstring normal_path_str, jstring crypt_path_str) {
    char *path = (*env)->GetStringUTFChars(env, normal_path_str, NULL);
    char *crypt_path = (*env)->GetStringUTFChars(env, crypt_path_str, NULL);
    crypt(path, crypt_path);
    //对变量的内存进行释放
    (*env)->ReleaseStringChars(env, normal_path_str, path);
    (*env)->ReleaseStringChars(env, crypt_path_str, crypt_path);
}


/**
 * 解密
 * @param env
 * @param cls
 * @param jstr
 * @return
 */
JNIEXPORT void JNICALL Java_com_example_ndk_filecrypt_Cryptor_decrypt
        (JNIEnv *env, jclass cls, jstring crypt_path_str, jstring decrypt_path_str) {
    char *crypt_path = (*env)->GetStringUTFChars(env, crypt_path_str, NULL);
    char *decrypt_path = (*env)->GetStringUTFChars(env, decrypt_path_str, NULL);
    decrypt(crypt_path, decrypt_path);
    //对变量的内存进行释放
    (*env)->ReleaseStringChars(env, crypt_path_str, crypt_path);
    (*env)->ReleaseStringChars(env, decrypt_path_str, decrypt_path);
}
5、编译生成.so动态库
- 点击Build -> Make Module app
- 可以在app -> build -> intermediates -> cmake -> debug -> obj 下看到对应的armeabi-v7a 和 x86 的so库
6、加载.so动态库,运行程序
- 在src/main 目录下创建 jniLibs 文件夹
- 将上面生成的 armeabi-v7a 和 x86 的so库 复制到该 jniLibs 文件夹内
- 运行程序
二、NDK开发进行文件拆分与合并
1、实现Java层native方法
- 创建Android项目
- 写一个含有加密和解密按钮的view
<LinearLayout xmlns:android="http://schemas.android.com/apk/res/android"
    android:layout_width="match_parent"
    android:layout_height="match_parent"
    android:orientation="vertical">

    <Button
        android:layout_width="match_parent"
        android:layout_height="wrap_content"
        android:text="拆分"
        android:onClick="mDiff"/>

    <Button
        android:layout_width="match_parent"
        android:layout_height="wrap_content"
        android:text="合并"
        android:onClick="mPatch"/>

</LinearLayout>- 编写一个实现对文件拆分合并的java类: FilePatchUtils.java
package com.example.ndk.filepatch
public class FilePatchUtils {
    static {
        System.loadLibrary("filepatch-lib");
    }

    /**
     * 对文件进行拆分
     * @param path  文件路径
     * @param count 拆分成多少个
     */
    public native static void diff(String path,String pathPattern,int count);

    /**
     * 对文件进行合并
     * @param pathPattern 需合并文件路径(%d)
     * @param count 将多少个文件合并
     * @param patchPath 合并后文件路径
     */
    public native static void patch(String pathPattern,int count,String patchPath);
}
在View对应的java类中实现相应的点击事件
public class FilePatchActivity extends AppCompatActivity {

  private String sdpath;

  @Override
  protected void onCreate(Bundle savedInstanceState) {
      super.onCreate(savedInstanceState);
      setContentView(R.layout.activity_file_patch);
      File sdDir = Environment.getExternalStorageDirectory();
      sdpath = sdDir.getAbsolutePath();
  }

   /**
   * 文件拆分
   *
   * @param view
   */
  public void mDiff(View view) {
      String path = sdpath + File.separatorChar + "ndk.jpg";
      String pathPattern = sdpath + File.separatorChar + "ndk_%d.jpg";
      FilePatchUtils.diff(path, pathPattern, 3);
      Toast.makeText(this, "拆分完成", Toast.LENGTH_SHORT).show();
  }

  /**
   * 文件合并
   *
   * @param view
   */
  public void mPatch(View view) {
      String patchPath = sdpath + File.separatorChar + "ndk_patch.jpg";
      String pathPattern = sdpath + File.separatorChar + "ndk_%d.jpg";
      FilePatchUtils.patch(pathPattern, 3, patchPath);
      Toast.makeText(this, "合并完成", Toast.LENGTH_SHORT).show();
  }
}
### 2、使用 javah 命令生成头文件
- 执行javah命令,因为AndroidStudio使用的是UTF-8的编码,所以在执行javah命令时需要指定编码为UTF-8(默认为GBK);
javah -encoding UTF-8 com.example.ndk.filepatch.FilePatchUtils
- 生成 com_example_ndk_filepatch_FilePatchUtils.h 文件

### 3、创建JNI目录,添加NDK本地支持
- 在src/main目录下创建jni目录,将刚刚生成的.h文件复制到该目录下
- 在项目配置中设置 Android NDK location 目录,需要提前下载 NDK 相关支持 (在Android SDK 下载中选择 SDK Tools 中的 LLDB 、CMake 、NDK 三项进行下载)
- 在jni 目录下创建 CMakeLists.txt 文件;同上;
- 在 app目录下的build.gradle 文件中配置jni 目录,以及NDK支持;同上;

### 4、实现头文件中定义的函数
#include “com_example_ndk_filepatch_FilePatchUtils.h”
#include <android/log.h>
#define LOGI(FORMAT, …) android_log_print(ANDROID_LOG_INFO,”FILE_PATCH”,FORMAT,VA_ARGS__);
#define LOGE(FORMAT, …) android_log_print(ANDROID_LOG_ERROR,”FILE_PATCH”,##FORMAT,VA_ARGS__);
/**
- 获取文件大小
- @param path 文件路径
- @return 文件大小
- /
long get_file_size(char *path) {
FILE *fp = fopen(path, “r”);
if (fp == NULL) {
}return 0;
fseek(fp, 0, SEEK_END);
return ftell(fp);
}
/*
Class: com_example_ndk_filepatch_FilePatchUtils
Method: diff
Signature: (Ljava/lang/String;Ljava/lang/String;I)V
/
JNIEXPORT void JNICALL Java_com_example_ndk_filepatch_FilePatchUtils_diff(JNIEnv *env, jclass cls, jstring file_path_str, jstring pattern_str, jint file_count) {const char path = (env)->GetStringUTFChars(env, file_path_str, NULL);
const char pattern = (env)->GetStringUTFChars(env, pattern_str, NULL);//得到分割之后的文件的路径列表
char **filePaths = malloc(sizeof(char *) * file_count);
//读取path对应路径,循环写入子文件
int i = 0;
for (; i < file_count; i++) {//给元素开辟空间 filePaths[i] = malloc(sizeof(char) * 100); //给元素赋值 sprintf(filePaths[i], pattern, (i + 1)); LOGI("patch path:%s", filePaths[i]);}
//分割文件
FILE *fp = fopen(path, “rb”);
int fileSize = get_file_size(path);
if (fileSize % file_count == 0) {//能整除 int part = fileSize / file_count; //逐一写入分割子文件中 int i = 0; for (; i < file_count; i++) { FILE *fwp = fopen(filePaths[i], "wb"); int j = 0; for (; j < part; j++) { fputc(fgetc(fp), fwp); } fclose(fwp); } fclose(fp);} else {
  //不能整除
  int part = fileSize / (file_count - 1);
  //逐一写入分割子文件中
  int i = 0;
  for (; i < file_count - 1; i++) {
      FILE *fwp = fopen(filePaths[i], "wb");
      int j = 0;
      for (; j < part; j++) {
          fputc(fgetc(fp), fwp);
      }
      fclose(fwp);
  }
  part = fileSize % (file_count - 1);
  if (part > 0) {
      FILE *fwp = fopen(filePaths[file_count - 1], "wb");
      int j = 0;
      for (; j < part; j++) {
          fputc(fgetc(fp), fwp);
      }
      fclose(fwp);
  }
  fclose(fp);
}
//释放
i = 0;
for (; i < file_count; i++) {free(filePaths[i]);}
free(filePaths);
//对变量的内存进行释放
(env)->ReleaseStringChars(env, file_path_str, path);
(env)->ReleaseStringChars(env, pattern_str, pattern);
}
/*
- Class: com_example_ndk_filepatch_FilePatchUtils
- Method: patch
- Signature: (Ljava/lang/String;Ljava/lang/String;I)V
- /
JNIEXPORT void JNICALL Java_com_example_ndk_filepatch_FilePatchUtils_patch
char pattern = (env)->GetStringUTFChars(env, pattern_str, NULL);(JNIEnv *env, jclass cls, jstring pattern_str, jint count, jstring patch_path_str) {
char patch_path = (env)->GetStringUTFChars(env, patch_path_str, NULL);
FILE *fwp = fopen(patch_path, “wb”);
int i = 0;
for (; i < count; i++) {
}//单个文件逐一写入fwp char *path = malloc(sizeof(char) * 100); sprintf(path, pattern, (i + 1)); LOGI("patch path:%s", path); FILE *frp = fopen(path, "rb"); //判断文件是否为NULL if (frp != NULL) { //获取单个文件大小 int file_size = get_file_size(path); int j = 0; for (; j < file_size; ++j) { fputc(fgetc(frp), fwp); } fclose(frp); } //释放分配的内存空间 free(path);
fclose(fwp);
//对变量的内存进行释放
(env)->ReleaseStringChars(env, pattern_str, pattern);
(env)->ReleaseStringChars(env, patch_path_str, patch_path);
}
### 5、编译生成.so动态库
- 点击Build -> Make Module app
- 可以在app -> build -> intermediates -> cmake -> debug -> obj 下看到对应的armeabi-v7a 和 x86 的so库

### 6、加载.so动态库,运行程序
- 在src/main 目录下创建 jniLibs 文件夹
- 将上面生成的 armeabi-v7a 和 x86 的so库 复制到该 jniLibs 文件夹内
- 运行程序